Integrate Serverless Index with Drupal
This page describes how to make your Drupal setup ready to connect to a SearchStax Managed Search Serverless index.
Drupal Support
Important: The SearchStax Search API currently supports Drupal 9.x and 10.x latest versions.
For additional information on integrating Solr with Drupal, check out our Tutorial for Integrating Solr on a Drupal Site.
Steps to connect Drupal to Serverless Solr
1. Install and enable the following modules. It is recommended that you install the following modules using Composer
- Install the Search API – https://www.drupal.org/project/search_api and enable it in Drupal
- Install the Search API Solr – https://www.drupal.org/project/search_api_solr and enable it in Drupal
- Install the SearchStax Search API – https://www.drupal.org/docs/extending-drupal/contributed-modules/contributed-module-documentation/searchstax-search-api and enable it in Drupal
Do not use the SearchStax: 1.3.4 module.
This module is not required when using Drupal with Managed Search Serverless indexes.
2. Click on the Configuration tab. Look for the Search and Metadata section and click on Search API to configure it.
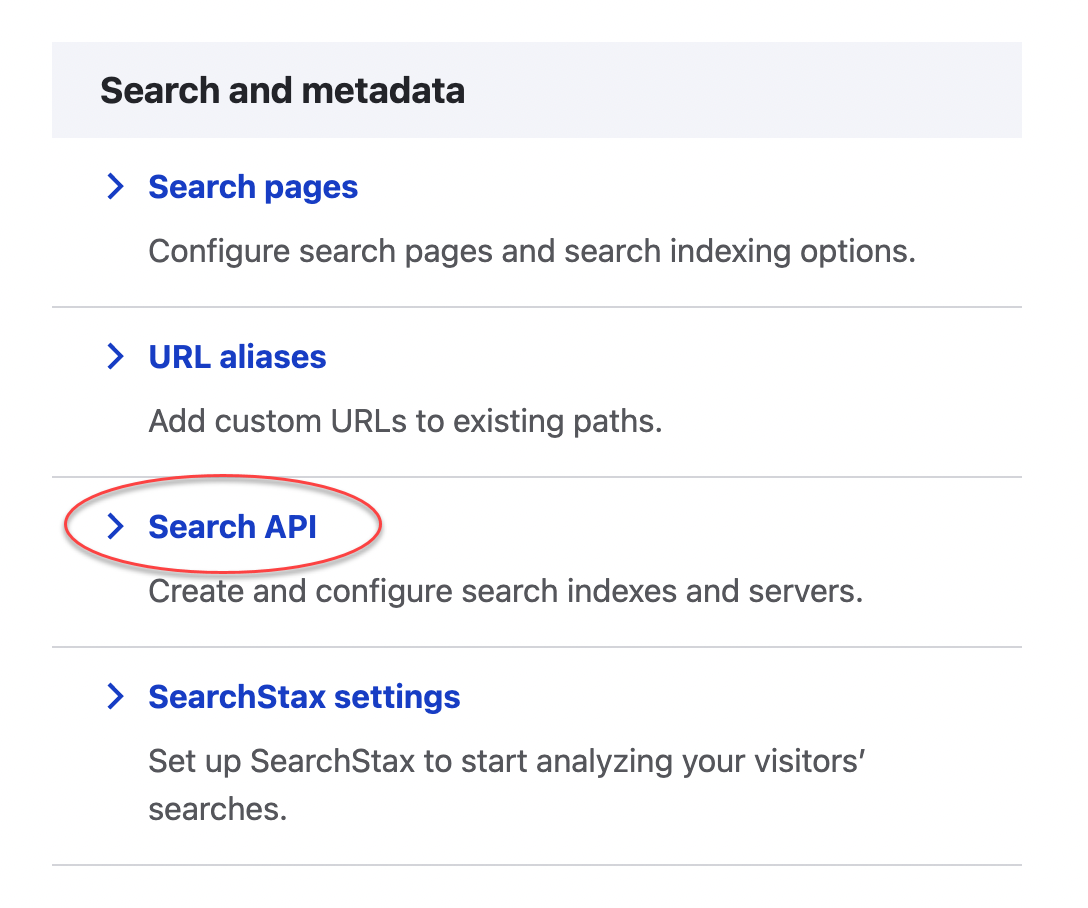
3. Once there, click Add Server.

4. Give your server a name. Make sure the Backend is set to Solr.
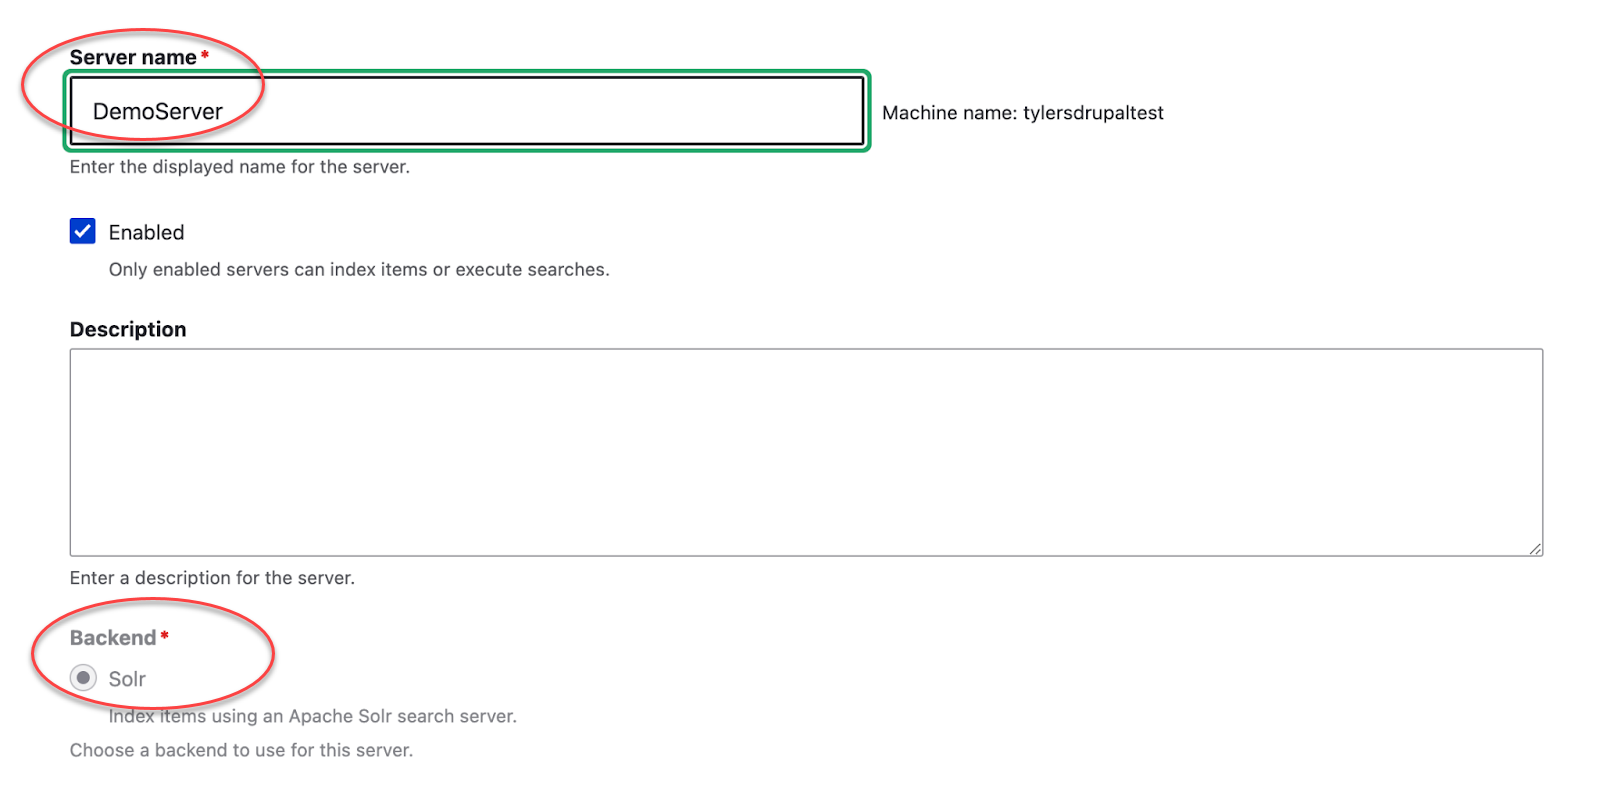
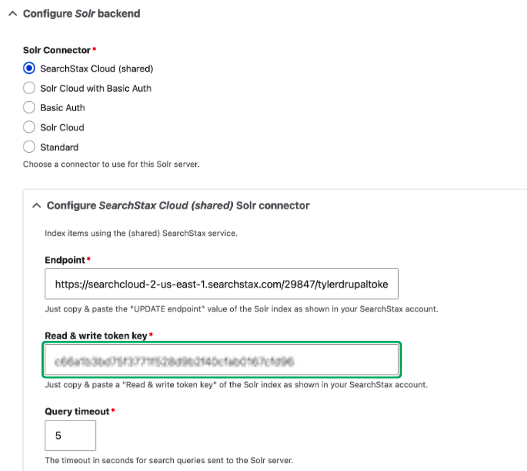
5. Configure the Server
- The Solr Connector: SearchStax Managed Search (shared)
- Check that HTTP protocol is set to https
- The Endpoint: the Update endpoint for your Serverless Index. The Update endpoint can be found in Serverless > Index Overview > Solr Endpoints
- The Read & Write token key: the Read & Write token for your Serverless Index. The Read & Write token can be found in Serverless > Index Overview > Token Management
- Scroll down and click the Save button
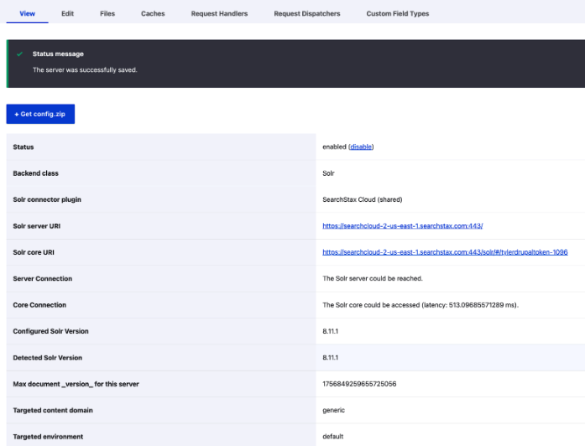
6. After pressing Save, your Server details should appear with a status message that “The server was successfully saved”.
- Server Connection status should read “The server could be reached”
- Core Connection should read “The Solr core could be accessed” with a latency reading.
7. Next you will need to define an index. In the Search API configuration screen, click on Add Index.

8. Give your index a name, and continue as you would through the various steps for configuring search functionality
- Data sources
- Data fields to index
- Adding Processors
9. Once you’ve customized your search index functionality, Manually Index Your Site: A cron job will periodically index your site automatically, but if you want to see your results immediately go to the Search API configuration screen and click on the index created earlier. At the bottom, click on the Index now button.

10. After you begin, you will see a progress bar. Once it reaches 100%, you will get a success message.
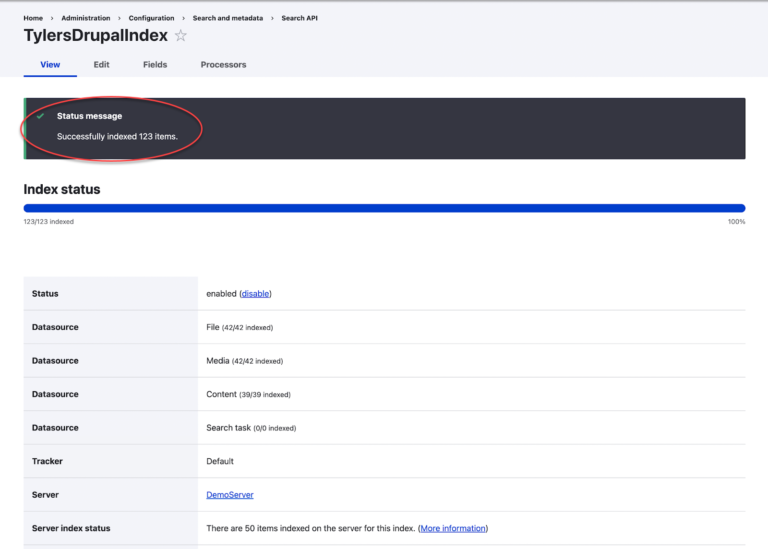
11. Now you have fully indexed your Solr index and it’s ready for search!
Contact Us!
Don’t hesitate to reach out to the SearchStax Support Desk. We are happy to answer your questions.

